
Tagged: craft supplies
Creating My 2023 December Daily Box
I know most people have just finished their December Dailies for 2022 and a lot of people are glad to get the holidays behind them. For the last several years I have put together a box of stuff to use for my upcoming December Daily. I do this for two reasons. First, all my Christmas crafting supplies are still out and easy to get to. Secondly, I am super busy during October and November because of the craft shows I do. Having a theme picked out and a box of stuff all ready to go really takes the pressure off when I decide to make my journal. The bonus of having a themed box is I have a place to stick all the fun ephemera and supplies I find during the year for my December Daily.
I hope you found this video helpful and may even consider setting your theme and box up early!
Burlap Heart Embellishments
Just in time for Valentine’s Day, I decided to make heart embellishments out of burlap. The process was really easy, but I think they came out really well. Here’s the simple process.

Cut some ordinary burlap into smallish pieces. The bigger ones in the picture above measure about 6″ square.

I painted the burlap for interest as well as to keep it from fraying when I cut it into smaller shapes.

I cut the fabric into heart shapes. Some were cut with a die and others I free-handed.

Here’s the fun part! I took out a lot of my Valentine’s Day stickers, bling and graphics. I also took out some sequins and plastic flowers.

Here’s the finished heart embellishments.


I will use these little embellishments on cards, tags or gift bag toppers. I hope this has inspired you to get out some of that plain old burlap you have lying around and make some fun embellishments!
My DIY Traveler’s Notebook
Most people who are in the arts and crafts or planner worlds know what a traveler’s notebook is. There are tons of videos and blog posts about how to set up your TN (traveler’s notebook). And what you use them for is only limited by your imagination. I have watched many YouTube videos showing pretty TNs filled with TN inserts and paraphernalia all which add up to the cost of a new car! I’m not kidding, the bare bones TNs, without inserts, sell from $30.00-$70.00. Yeah, I’m so not cool with that.
So I decided to make my own TN. Basically all they are is a piece of leather or vinyl and some elastic cord. So how hard could it be to make my own? Not hard at all. I used two pieces of sample vinyl wallpapers from one of those huge sample books. First I glued them backsides together so I have a pretty cover and inside. Then I followed a video detailing how to attach the elastic pieces.
This is what my bare bones TN looks like.

Okay, I know it doesn’t look great yet, but that is because I haven’t worked on any of the pages inside.
I am using my TN as a prayer and Scripture book. But if that’s not your thing, you can use them as day planners, art journals, junk journals, glue books, etc…
Here are some of the pages I’ve made for my journal. As my prayers are private, I photographed these pages before I wrote my prayers on them.


Traveler’s notebooks, however you deem to use them, are a great way to use your creativity as well as use your stash!
If you don’t already have a TN, check out some videos about them. I bet you’ll get hooked just like I did!
Happy Mail From Betsy Doodle!
I was blessed this week to receive a package of wonderful handmade items from Dee Webster, otherwise known as Betsy Doodle on YouTube. Dee generously gave away a few extra prizes after her “hand of friendship and card for Mr. Doodle” challenge. I am so thrilled I won because she is such a talented lady. Here are the items I received all the way from Lincolnshire, England.

Look at this pile of art supply goodness!

Here are some wonderful napkins to decoupage with. Being that I am originally from England myself, I’m partial to the Union Jack napkin!

Dee’s hand-made painty papers are to die for. I will share the projects I use these in if I decide to take them out of the hoard vault!!!

A large and small pocket folder, ATC, tickets and some marbled papers. I’m swooning.
I just love this prize and promise to use the items after I’ve enjoyed just looking at them long enough. If you’ve never watched Dee’s YouTube channel, do yourself a favor and check it out. I guarantee that after watching a video or two you’ll be hooked like I was.
The link to her channel is:
https://www.youtube.com/user/BettsyDoodle/videos
Thank you again Dee for such a lovely surprise and thank you all for letting me gush about it!
Great Junk Journal Fodder Haul
I have already started making junk journals and such for the upcoming Christmas season. Although I really don’t need a lot of ephemera to make new journals, I did want to beef up my stash a little bit. So I picked up some really cool stuff in the last couple of weeks and wanted to share it with you. So without any further ado, here’s the stuff I hauled.

Cool old books and magazines. The pictures in these books are fantastic!

More vintage books with great graphics.

This book is not that old but…

the inside is chock full of vintage street signs. These will also be great to use in my mixed media projects or as embellishments in my journals!

Two more vintage cookbooks, but check out the insides of these…

great pages for journaling. The top one gets extra points because it’s a binder!

Vintage wrapping papers and tissue papers, because the one huge box I already have is apparently not enough! Again, these can be used in junk journals or in mixed media.

Vintage kitchen labels, a note pad and vintage sewing supplies. These are great additions to junk journals.

A box crammed full of vintage matchbooks. The matches have already been taken out so these will make great tags and embellishments for my journals. This photo doesn’t show the quantity too well but there are at least 250-300 old matchbooks here!

And lastly, a yummy box of old ephemera. There are all kinds of receipts in this lot. Also included were some cards of vintage rickrack and some old pens, some of which are fountain pens.
So all in all, I feel well stocked for a while and am ready to get on with making the journals. If I remember, I’ll show you some of the finished ones.
It gives me a great feeling to know I can reuse these old treasures to make journals and mixed media projects people will enjoy. Recycling is always a win-win situation!
99 Cent Art
Last year when I was still permitting myself to buy art supplies, I ran across this little mixed media kit at Tuesday Morning. As you can see, the kit only cost me 99 cents.

I came across the kit again as I was tidying up my craft room and decided it was time to do something with it.
Here are the contents of the kit.

Because the pieces are so small, they lent themselves well to making Artist Trading Cards (ATCs). Here are the ATCs I made.


Besides the cardboard used for the 2 1/2″ x 3 1/2″ bases, the only other items I used from my stash were rhinestones, brads, a few pieces of washi tape and of course, glitter glue! I hated the color of the bright green corrugated cardboard so I flipped it over and used the backside.
Challenging myself to use up some of my stash is always so much fun. These little ATCs took me no time at all and I used most of the elements in the kit. Why don’t you pull out 15-20 pieces of bits and bobs from your own stash and make your own kits to use and give away to your artsy friends. It’s a good way to use up older supplies and is guaranteed to spark some creative genius!!!
After The Party Up-Cycle Tags
The Christmas holiday season is over and all the goodies are gone, including the 3 batches of Chex mix I made. So it’s time to say goodbye to the empty cereal boxes.

Some went the way of the recycling bin and others… well, they went the way of my craft room.

I cut a box into tag shaped pieces.

Then I covered one side with printed paper and the other side with plain white card stock.

I layered on pieces of different papers and sandwiched trims, pieces of paper doilies and snippets of tulle between the layers.

Here are the finished tags.


I didn’t buy anything for this project. I only used supplies from my stash. I think they turned out pretty well considering they started as waste.
I hope this inspires you to look in your recycling bin, pull something out, and use items in your stash to create something pretty and new!
I’m Not Buying It!
I’m writing this post so that I will feel accountable for my next sentence. I am NOT going to BUY any new craft supplies in 2017 unless they fit the two specific criteria I have laid out here. First, I am ALLOWED to buy the NECESSITIES if I run out. By necessities, I mean things like paint, glue, artist pens and pencils, gesso, etc… Second, I CAN BUY art supplies if I find them ridiculously CHEAP at thrift shops, yard sales or flea markets. That’s it! I am not going to go to Tuesday Morning, Hobby Lobby, Michael’s or any other store just to browse and see what they have. Browsing usually ends up costing me a lot of money!
So why am I making this bold statement? When I was crafting for Christmas, I found I had so many Christmas items in my stash that I didn’t need to go out any buy anything. I made lots of December Dailies, cards, tags and embellishments without purchasing a thing. The amazing thing is, I still don’t need to buy anything for next year either. I have so many supplies I’m drowning in them. Ditto for Valentine’s Day, Easter, Summer, Fall and you get the idea.
Now here’s where it hurts. I’m going to expose my shame and show you all the stuff I have to craft and make mixed media with. Ready?

Shelf full of card stock, stencils, journals, and books and files of ephemera.

Storage cubby filled with everything imaginable under the sun!
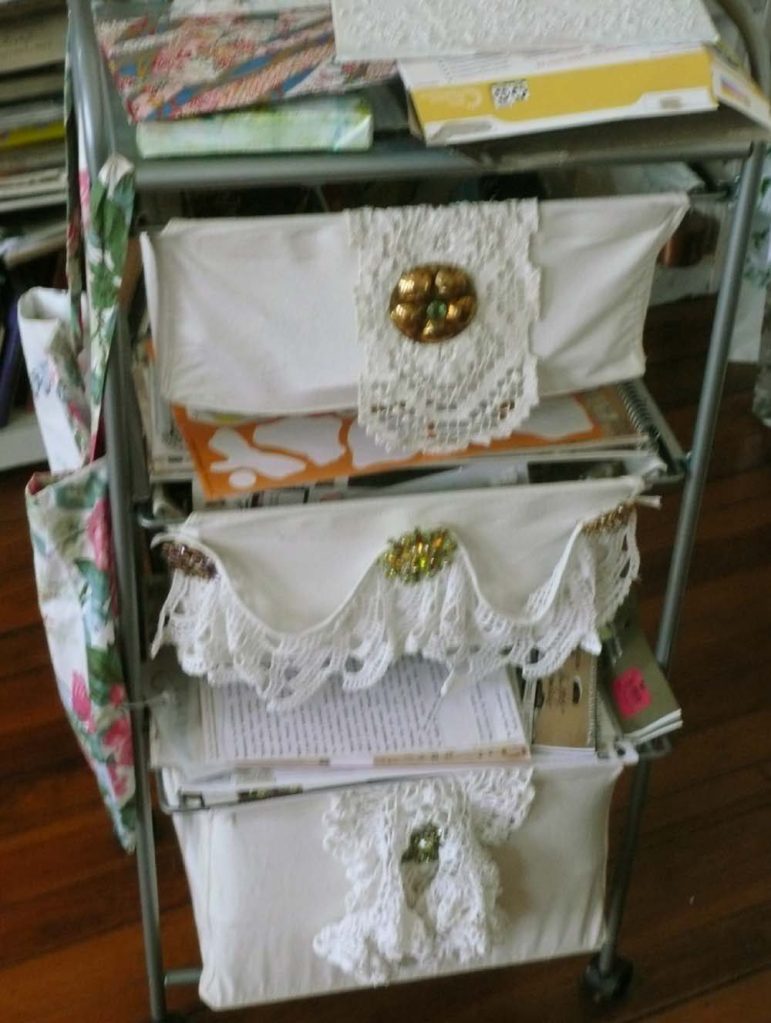
Rolling cart filled with punches, oil pastels and TWO drawers of stickers.

The surface of my desk. There is so much stuff on it I only have about two square feet to work on!

Under my desk are paper collections, paper pads and suitcases full of embellishments.

A Raskog cart from Ikea filled with paints, markers and more embellishments.

A metal shelf from Ikea filled with stamps, scrap paper, beads, lace and other “stuff”.

A vintage cabinet stuffed to the gills with items for making Junk Journals and Christmas projects.

More books for ephemera.

Another Raskog cart filled with Junk Journal fodder and a plastic drawer unit filled with jewelry making supplies.
Sadly, this is not all. There are some drawers in my studio and other places all over the house that have craft supplies in them. Now you can see why I don’t need to go shopping anytime soon. Everything I have I liked enough to purchase or save, so now it’s time to use it all up. I’m excited about the thought of actually having room to breathe in my studio.
Okay, so it’s confession time. I already did buy something this year. This is what I bought.

Two old reference books.
My justification is that they were cheap (only $1.00 each) and….

They are filled with pages and pages of these beautiful nature graphics! I can use these for so many projects.
So there you have it. I feel better after this photographic confession and goal for 2017. Hopefully you will be seeing a lot of posts showing the stuff I have been making.
If you feel like you’re suffocating in your supplies, or you want to save some money, craft from your stash and have fun with the supplies you already have on hand. Good Luck!
Easy Tags From Scraps
Okay, here is the last project I have for now that deals with using up your scraps of paper. This project is great for using long thin pieces of scrap paper, not tiny fragments. But the best part of this project is that you can use up some of your ugly papers!
My inspiration for this project came from this video:
First I selected my paper scraps, some ugly and some nice. The only requirement is that they be of the same thickness. You’ll want to cut your ugly papers into strips about 2 or 2 1/2 inches wide.

Here are my ugly strips.
Then you want to cut your nice strips into widths of varying widths also.

Here are my nice strips.
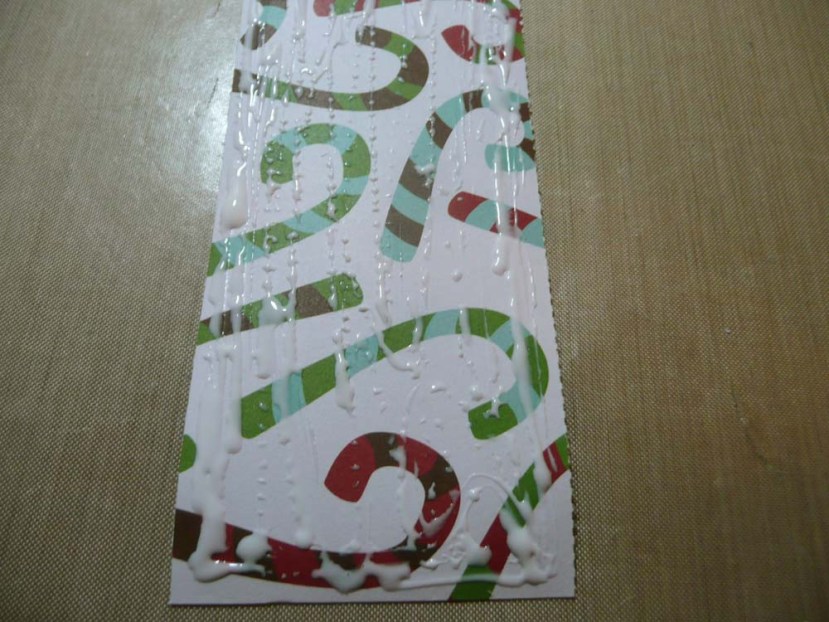
Now you will add any cheap glue to an ugly strip, making sure you’ve got good coverage.
Next, start laying your nice strips at a slight angle over the ugly strip.

Be sure your nice strips are covering the ugly strip and that they are lined up tightly against each other without any gaps.

Keep going until you have finish covering the entire length of your ugly strip.

This is what the back looks like.

Now trim off all the excess paper around the ugly strip. Most of these trimmed pieces will still be long enough to use again.

Cut the strips into lengths you like. I pretty much just cut each one in half, although I did to a little extra trimming off the top or bottom to achieve the look I wanted.

Cut the top corners off, punch a hole and insert cord or baker’s twine. Now you have unique tags!

They can even be topped off with the scrap embellishments you made from the directions in my last blog post.
I think these tags are such a great idea and each one will turn out differently. Again, you can make these crafts with any paper and any theme based on what scraps you want to use up.
I hope you will try these scrap projects I have posted lately. Not only are they using up scrap papers and saving you money, but they are so much fun.
When I come across other ingenious ways of using up scrap papers, I promise to share them with you!
What’s On My Desk ATC
Every once in a while I get the urge to make a project just using the junk that is cluttering up on my desk. I decided to make an ATC sized magnet so I could reuse the magnet strip off list pad I had just finished up. I always have varying sizes of cardboard on my desk so that was a no-brainer for the substrate.

I opened a new bottle of gesso and an obscene amount poured out onto my little ATC. I was actually able to gesso 2 – 8 x 10 canvas boards, 2 – 5 x 5 stretched canvases, 1 – 6 x 8 canvas board and my ATC with that huge puddle!

Next, I painted on some cream and brown acrylic paints to give it a vintage feel.

This very blurry picture shows some eggs I cut from some scrapbook paper. I inked the edges with distress ink before decoupaging them onto the card.

Here is the “finished ATC”. It’s really simple, but it gives me that old field guide feeling.

I painted the back of the card the same color blue I spattered on the eggs and attached the magnet strip from the used up note pad.
I like how the ATC magnet came out, but I just needed to add one more touch to make me love it.

Yep, you guessed it. I added glitter to the butterfly’s wings. NOW it’s done and I do love it! I hope you like it too and that it inspires you to make your own little work of art with things that are already on your desk!
