
Tagged: art journal
Fun Prayer Journal Spread With A Confession!
Right now I’m going to cling to the old saying that no one is perfect! I had all the opportunity to choose the right thing to do and I blew it. I decided to listen to my selfish natural self instead of listening to the crystal clear voice of the Holy Spirit. Here’s what happened!
Playing With Trash
Who knew that playing with trash could be so fun? I have been working in some of my trash journals and am having a blast. Using just trash really stretches my creativity.
What does one use in a trash journal? To me it is anything I would otherwise throw away. I also allow myself to use things like old book pages because I have enough to last three lifetimes.
I hope you’ll step out of your comfort zone and give trash journaling a try. There are no hard and fast rules so you can define “trash” for yourself. Have fun playing with your trash!
Easy Tags From Scraps
Okay, here is the last project I have for now that deals with using up your scraps of paper. This project is great for using long thin pieces of scrap paper, not tiny fragments. But the best part of this project is that you can use up some of your ugly papers!
My inspiration for this project came from this video:
First I selected my paper scraps, some ugly and some nice. The only requirement is that they be of the same thickness. You’ll want to cut your ugly papers into strips about 2 or 2 1/2 inches wide.

Here are my ugly strips.
Then you want to cut your nice strips into widths of varying widths also.

Here are my nice strips.
Now you will add any cheap glue to an ugly strip, making sure you’ve got good coverage.
Next, start laying your nice strips at a slight angle over the ugly strip.

Be sure your nice strips are covering the ugly strip and that they are lined up tightly against each other without any gaps.

Keep going until you have finish covering the entire length of your ugly strip.

This is what the back looks like.

Now trim off all the excess paper around the ugly strip. Most of these trimmed pieces will still be long enough to use again.

Cut the strips into lengths you like. I pretty much just cut each one in half, although I did to a little extra trimming off the top or bottom to achieve the look I wanted.

Cut the top corners off, punch a hole and insert cord or baker’s twine. Now you have unique tags!

They can even be topped off with the scrap embellishments you made from the directions in my last blog post.
I think these tags are such a great idea and each one will turn out differently. Again, you can make these crafts with any paper and any theme based on what scraps you want to use up.
I hope you will try these scrap projects I have posted lately. Not only are they using up scrap papers and saving you money, but they are so much fun.
When I come across other ingenious ways of using up scrap papers, I promise to share them with you!
DIY Masks For Mixed Media
In my last post I up-cycled some manila file folders. I cut out shapes from a magazine and used them as masks on my mixed media background.


I really like how they turned out, but the magazine paper was very thin so the masks wouldn’t last very long before they just turned to mush.

I came up with an idea of how to make my own masks that will last for a long time.

I used some clear contact paper that I had picked up at a thrift shop eons ago. At the time I didn’t have any use for it but thought it might come in handy sooner or later.

I sandwiched each picture between two pieces of contact paper and then cut them out leaving about a 1/4″ border. You must leave a border so that the contact paper can stick to itself and seal in the cutout.

These are the masks I made using magazine pictures.

And here are some I made using pictures from old pattern sleeves.

I had this background already done in my art journal so I just rubbed around this mask with some black archival ink using a make-up sponge. Obviously the page isn’t finished, but she makes a great focal point.

This piece is in my faith art journal using the Scripture Psalm 91:4.
I love making these masks and I am thinking of finding some pictures of animals and objects to add to my diy mask collection!
If you have some old contact paper, or laminating sheets lying around, try making some of your own masks to add something different to your mixed media projects!
Drawing Whimsical Animals
Recently I had the opportunity to take a two-session class on drawing whimsical animals. Seeing as I can’t even draw a good stick figure, I felt a “whimsical” class would suit me better than taking a “realistic” animal drawing class. Besides, I feel whimsical animals are better suited to my mixed media pieces than realistic animals.
We worked on the basics like eye placement and how changing the eyes and eye brows can totally affect the mood portrayed by the animal.
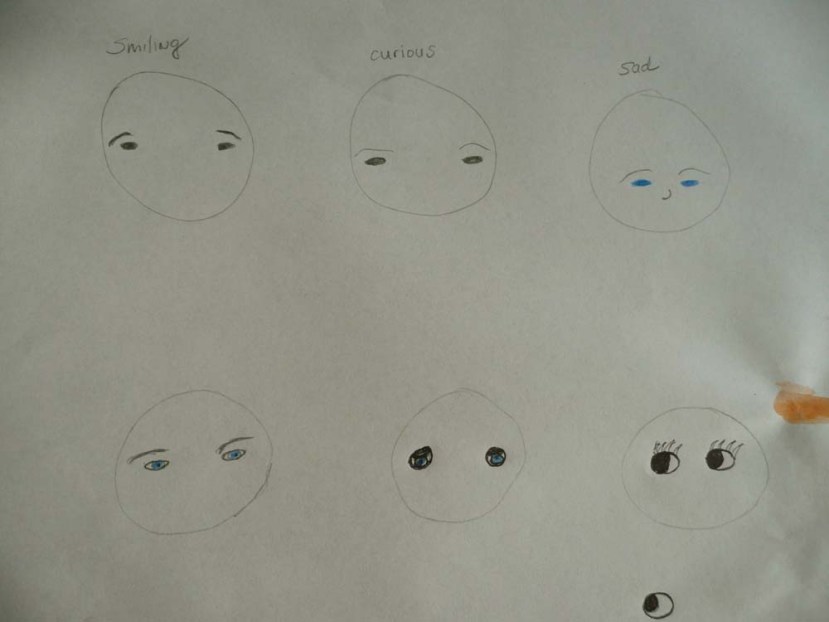
Testing out eye placement and eyebrows.
After copying different animals the instructor provided, we worked on our first mixed media piece. The teacher asked that we include at least two animals and there be some kind of story between them. This is what I came up with.

My first attempt at drawing whimsical animals.
Putting clothes on animals is a sure way to add whimsy. I even gave my rabbit red boots to wear with her flowered dress.
We had a week between classes so I practiced drawing all kinds of whimsical animals. Here are some of my practice pieces.

This skyward looking bunny actually started out as and owl.

Kitties

Owls

More owls

And yet another owl.

Whimsical donkeys
The second session had us copying one of the instructors pictures. The funny thing was, I thought her animal was a deer and my other classmate thought it was a rabbit. The teacher said it was actually a peacock. Since only the head was showing, we all saw it a different way. So our instruction was to copy her picture, but make the animal into what we wanted it to be. Here is just the head shot of my funny deer.

My whimsical deer.
I had a lot of fun in that class and I am quickly filling up a journal with funny animal doodles. My goal is to create several animals in a style that is completely my own.
If you are in the Fredericksburg, Virginia area. You can find the drawing whimsical animals class at Lord and Lilly’s, 611 Caroline Street, 540-371-1333.
Drawing whimsical animals or people is an ideal outlet for those of us who are stick-figure challenged!
It’s Beginning To Look A Lot Like Christmas…Already!
I am already making items to sell at my shows this fall. Gifts items and Christmas decorations are what I am concentrating on. Because the biggest show I am doing is a very expensive show to participate in, my theme for making items this year is, “Something out of nothing”. What this means is I am using up my stash of craft supplies and up-cycling and recycling everything I can in order to offset my expenses. I am not buying much of anything to complete my items. It does not mean, however, that I am producing anything that is not up to my standards. It just means I’m being more creative, which is actually quite fun!
Here are some pictures from one of my first show projects.

Stacks of coffee dyed papers and envelopes.

Coffee dyed papers and envelopes sorted into equal stacks. Each book will have twenty pages.

Inside pages of hand bound junk journal.

Ten finished hand bound junk journals with different covers.

Finished stack of junk journals bound up and ready to pack!
These junk journals were made only with stuff I already had on hand, so my only investment was a little time.
This is the first completed set of books I made. I will be making many more junk journal/glue books of various styles for the shows. I absolutely love making journals and can’t wait to start my next project!
Just Messing Around
I was lucky enough to purchase this big bunch of old hand written and typed letters recently.

Big bunch of old hand written and typed letters.
I really had no idea what I was going to do with them. I looked around my craft desk and my Twinkling H2o’s (shimmering watercolor paints) were still at hand so they were the medium of choice.

Twinkling H2o’s ready to be used.
So I just sat down and made a big mess with lots of paint and water. It was really quite fun.

Water color paints on an old letter.
I used every color of H2o’s I had in different combinations. After playing and letting the letters dry, this is what I had.

Yummy pile of shimmery water colored papers.
But now what? I knew I could tear some of the papers up to use in mixed media pieces or my art journal but I had another idea.

Little Stampin Up stamp sets I got for my birthday.
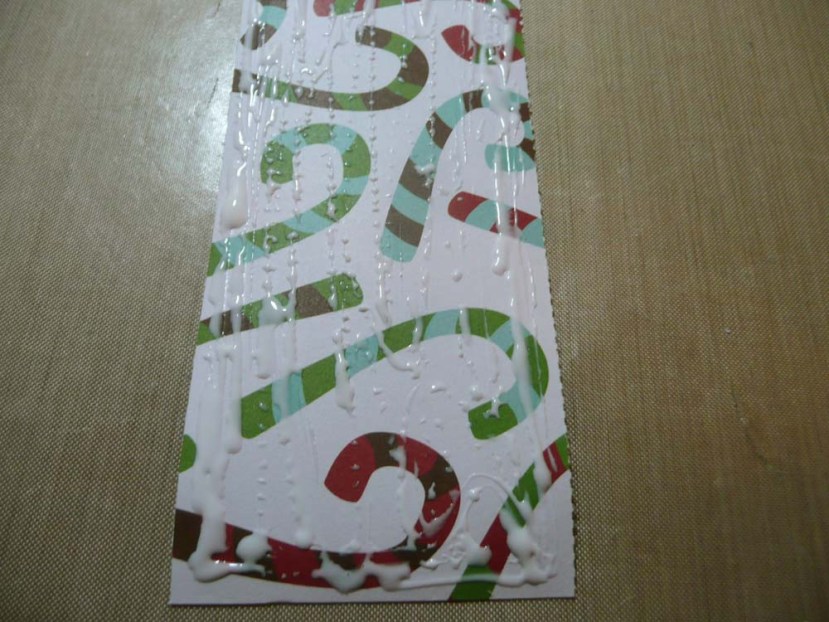
These fun little stamps were also still on my craft desk so I decided to use them on some of the paper and make a bunch of small embellishments.

Little embellishments to use in mixed media or my art journal.
I think they turned out really cute and they have an awesome crackling paper texture. Now I am ready to made an art journal page using some of these cute little embellishments that were made from just messing around!
Learning From Mistakes
Being a perfectionist and creating art just don’t go well together. I am a very particular person and like things neat and tidy. Mixed media art is anything but neat and tidy. Last night I was playing around with this piece. At some point I decided it needed some black stamping on it. Okay, so no it really didn’t. The stamped areas were uneven and looked terrible. I was so upset that I had ruined my pastel chalk background. Then the light bulb turned on and I decided to cover up the black stamped patterns with circles cut out of scrapbook paper. Wow! I love that the six scrapbook paper circles added a much-needed punch of color to this piece. Instead of adding a focal point graphic I just want to remind myself that mistakes are okay as long as I learn from them!

So what lesson did I learn? Don’t give up on your artwork after making a mistake, just figure out a way to redeem it!
Mixed Media Odds and Ends
Just a quickie post today as I don’t have too much to share.
I have been very busy lately with Mossy Cottage but I did manage to finish (I think) one page from my first attempt at Journaling by 5s by Shannon Green.

“Dance”. First finished page from journaling by 5s.
And here is an ATC (Artist Trading Card) I made for a challenge.

ATC card I made for a challenge. Inspired by Gina b. Ahrens first UStream video.
Well that’s all for this post. Hopefully I’ll have some time now to work on some more of my art journal pages. I’ll post them as I finish them. And if you haven’t tried journaling by 5s yet, what are you waiting for???
Journaling by 5s, Part 5 (This Is Just The Beginning)
I am now on the last “mandated” part of Journaling by 5s by Shannon Green. As you can recall the first 15 minute session was paint/ink for color, the second was collage/recycled stuff for texture, the third stamps/stencils for pattern, the fourth words/images for focal point and lastly pen/pencil for finishing details.
Why is it that 15 minutes is so long when we are waiting at the Doctor’s office or for a table at our favorite restaurant and so short when we are on Pinterest trying to be creative? One would think it easy to doodle some words and scribbles on 20 pages in 15 minutes, right? Wrong! Once again the timer kicked my butt and although I worked on all 20 pages, I am nowhere near finished. Mostly what I did during this time is to outline pictures and words with my Pitt Pens and then smudged the lines to give a blended effect. You have to look really hard to see it in these pictures, but trust me I did it.
Here are some pictures of pages I have been working on. I won’t bore you all to death with all twenty pages.


Shannon says in her video that after you finish the 5 sessions you have “free time” to work on the pages as you wish. These pages are really just in their beginning stages and will take a lot more work. I am looking forward to working on them and will post some pictures here and there as I get the pages done. The thing with mixed media is that I “have to be in the mood” in order to do it well.
Now, drum roll please! Here is the status of the heinous page so far……

Beginning to look not so heinous after all!
